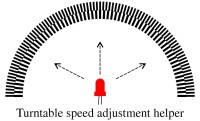
Turntable Speed Adjustment Helper

Adjusting the speed of a turntable has become difficult with modern LED lights. Stroboscope disks are expensive if available at all. Disks in PDF format are included and a very simple Arduino program takes care of proper lighting.
See also Part 2.
Recently, I was asked to adjust the speed of a record player. Someone had tampered with the adjustments for obscure reasons. This should have been an easy job. But I had to tackle two problems:
1. I did not have a stroboscope disk anymore
2. The lights in my house are all LED lights, which do not have the required 100 Hz brightness modulation.
A quick search on the Internet taught me, that stroboscope disks are still available, but at considerable costs. The prices start at about €10.00. Too much for a one-time job. So I created my own stroboscope disks with the French program Galva.
Included here are the PDF files and the Galva program source files for stroboscope disks for various speeds.
For normal "daily" use, the stroboscope_45_33.pdf will do. It contains the bands for adjustment of 33 1/3 rpm and for 45 rpm. Another file, stroboscope 78_16.pdf contains bands for the antique 78 RPM disk speed and the rare 16 2/3 rpm speed.
There is also a disk for all 4 speeds.
After printing "at real size", there are two circles in the middle of the disks to help with creating the proper spindle hole: 7 mm for the standard hole and 38 mm for the thick spindle.
Note: These disks only work with light that is modulated at 100 Hz, such as traditional tungsten lamps in a 50Hz AC net. (Booth the negative half and the positive half of the mains cause a higher level of light; hence the light modulation has a frequency of 100 Hz)
To illuminate the stroboscope disks, I used an Arduino, (UNO or Nano) which has a white LED connected to a PWM output of timer 1. To reduce the 16 MHz Arduino clock to 100 Hz, division by 5 is 4 times required. This means division by 625, which cannot be done by an 8 bit counter/timer. So the use of the 16 bit timer/counter of the Arduino is required. The alternative is a software division, but it is much simpler to let the hardware do the job. The Arduino will produce a 100 Hz pulse with approximately 25% duty cycle, and that works fine with the disks. The resulting Arduino sketch has a 4 line setup part and an empty loop.
It worked great, and the turntable could easily be adjusted to run at the correct speed.
If you live in an area with 60 Hz mains, you can still use these disks together with the Arduino program. The 100 Hz Arduino pulse is independent of the local mains frequency.
Pjotr1010
November 2022


Discussion (8 commentaire(s))