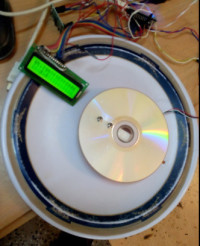
5 kg kitchen scale built on Arduino

The following article will describe how to build up a simple cheap yet very effective 5KG (max) kitchen weight machine for a penny ! Change the strain gauge for a bigger capacity and your bathroom scale is just ready – both are just the same.
The following article will describe how to build up a simple cheap yet very effective 5KG (max) kitchen weight machine for a penny ! Change the strain gauge for a bigger capacity and your bathroom scale is just ready – both are just the same. The MCU we would use is an Arduino with boot loader, a strain gauge ,a 16*2 LCD panel , HX711 analog amplifier few contraption, hardware fitting, nuts, bolts and washers and your weigh machine is up and ready.
Operation : The software is built on Arduino-on-board principle. After burning the code into an ATMEGA328 ,the chip is taken out and put onto the production board. The initial reading may have errors as the probe is not yet calibrated. So press the push-button connected to digital pin 10 once and the probe will self calibrate and the initial reading of 0.0 will be shown. The zero set figure will then be stashed into the inbuilt EEPROM of the Arduino. Next time when you restart it after a switch off operation ,the zero set reading will be read from the EEPROM and then the internal calibration will be adjusted according to that and would be shown on the top line. The 2nd line will show 0.0.
Weighing Liquid: First place the container on the tray. Press the push button and this will be the new 'zero' set reading for the scale. Add liquid to the container and get the weight of the liquid directly from the LCD. So simple !
While taking reading if you find that the reading reduces when you increase load then just reverse the white and green wires and it will be solved.
Construction Detail: Well my wife and daughter contributed to the development of the platform for the scale.
IT'S TWO MELAMINE (HARD PLASTIC) PLATES. One fitted with the other, keeping the strain gauge sandwiched in between with two elevated bolts.
The elevation is created with two thick nuts as washers (see pics)


Discussion (0 commentaire(s))